Category Archive Physiotherapy A-Z

Hot Tub Hydrotherapy – Types and Health Benefit

Hot Tub Hydrotherapy /Right after we got married, my wife suggested we buy a hot tub. She had a hot tub in her backyard growing up, and her family used it regularly as a therapeutic and motivating way to put health and self-care front and center in their lives. Nearly every Saturday morning, they all soaked in the hot tub to warm up before taking a hike in the hills nearby. Her parents understood the important role their hot tub played in their wellness practices, so they instilled that same understanding in their kids, along with a commitment to an active lifestyle.

Today, my wife and I support each other in that same commitment, using our own hot tub every morning as a way to kickstart the day. We step out of our 20-minute soaks feeling energized and empowered to keep making healthy choices. And we both agree that if we miss a morning soak, we feel sluggish and out of sync with our other healthy routines.

The overall benefits of hydrotherapy are known to many, but as we’ve learned from our own hot tub experiences, the benefits of daily immersion can transform your life from the inside out.

Better Health Through Hot Tub Hydrotherapy

As a digital marketer for Watkins Wellness, the global leader in hot tubs, I see the comments on our website from customers who share the many ways hot tub immersion can transform the body and mind.

Renewal

When hot tub hydrotherapy is an ingrained self-care practice, rather than an occasional luxury experience providing a few moments of relief, you build a lifestyle around proactive revitalization. Daily immersion renews your body’s suppleness and can help you achieve relaxation and a calm state of mind to keep you present throughout the day.

Your home hot tub offers relaxation and renewal every day.The best hot tubs for hydrotherapy are designed to give you a personalized experience of relaxation and stress relief. Simple controls allow you to adjust the temperature and jet intensity every time you soak. The option of built-in aromatherapy, along with features such as mood lighting or a waterfall, can create just the right ambiance. With the perfect hot tub environment for relaxation, you can decrease stress and anxiety, improve sleep, and set the stage for health and wellness. Just 20 minutes of water immersion a day can work in tandem with your healthy practices to keep you motivated.

Rejuvenation

A hot tub is an incredible resource for preparing the body for activity. Warm water immersion helps loosen muscles, ease stiffness that can lead to strain and injury when exercising, and relieve mild joint pain. A 20-minute soak before each workout can improve circulation and flexibility as the body warms up.

Hot tub hydrotherapy is great for sore muscles before and after exercise.After a workout, a hot tub can soothe overworked muscles. Hot Tub Circuit Therapy, which is similar in style to the circuit therapy a personal trainer might apply to strengthen muscle groups one at a time, uses specially designed and positioned jets to massage targeted muscles and relieve tension. A warm soak combined with jet massage after exercise can soothe sore muscles and assist in body recovery, so you’ll be ready for your next exhilarating workout.

If you’re interested in cold water therapy to help reduce inflammation and rejuvenate overworked muscles after your workouts, consider a hot tub that offers the option of  CoolZone technology. This feature allows you to efficiently control water temperature within a wider range (from 60 to 104 degrees) for ultimate customization of your hot tub hydrotherapy. Plus, it provides for a cool and rejuvenating dip when the weather is warm.

Reconnection

If you’re just beginning your daily immersion routine, or if you tend to procrastinate due to a busy schedule, consider asking others to join you for inspiration to succeed. With the support of a few allies, who can hold you accountable to your intentions, you may become more committed to your wellness and lifestyle goals.

Your home spa is a great opportunity for socializing and enjoying quality time with your family.

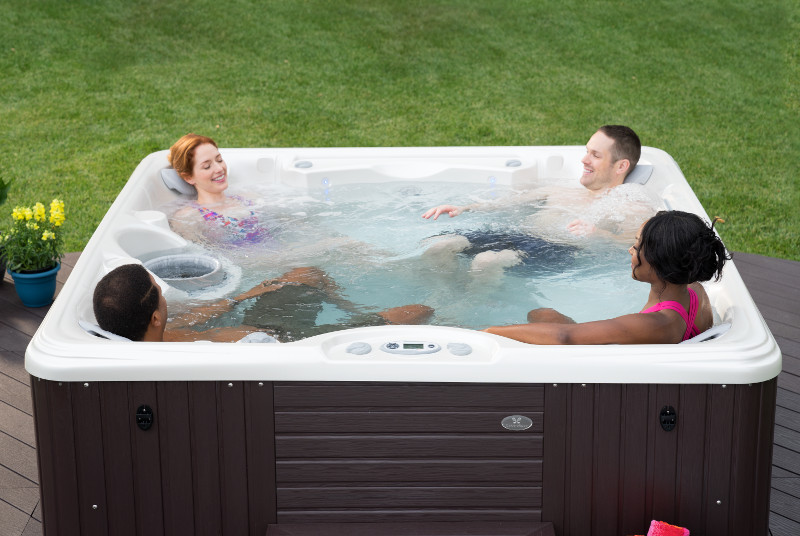
Whereas some spas are designed with a small footprint for individual use, others offer the space to share the benefits of hot tub hydrotherapy with your partner, with family, or with friends. Precise temperature controls allow you to adapt the soak to suit children and other temperature sensitive individuals. Entertainment features, such and a wireless TV/video monitor, can provide fun, memorable experiences.

Hot tub water immersion on a daily basis isn’t just therapeutic for your body and mind; it’s also healthy for your social life and closest relationships.

Immerse Yourself in the Hot Tub Lifestyle

Hot tub hydrotherapy can be a luxury you indulge in once in a while or a daily practice to help lower stress, ease physical tension, nurture relationships, and inspire regular self-care. I know that by letting my hot tub stand at the center of my circle of wellness, I cultivate a constant commitment to good health, happiness, and the lifestyle I envision. You can do the same.

A high-quality hot tub can improve your life in ways you may not have considered before. Hot tubs bring your family closer together, and they give you a reason to invite your friends and neighbors over for a visit. Whether you’re staying up late to watch a meteor shower in the backyard or waking early to watch the sun rise, your hot tub helps you connect with the natural world around you.

Incorporating hot tub usage into your daily routine can also help improve your general well-being. Regular sessions in your spa might help you reduce stress, ease pain, improve the quality of your sleep, and increase your flexibility. While only your doctor or a qualified medical professional will be able to tell you whether hydrotherapy—the use of water to relieve pain and treat various medical conditions—might be beneficial to you, here are some potential hot tub health benefits

Improved Range of Motion

As we age, we lose our range of motion. This process is gradual for some and swift for others, depending upon factors such as genetics, activity level, injuries, and the presence of any medical conditions like arthritis.

Through regular usage, your hot tub can help you restore lost flexibility and slow the natural stiffening that comes with age. The warm water of your spa works to create hydrostatic pressure—the pressure caused by the weight of fluids—on the body. This reduces joint inflammation, which in turn aids mobility. The buoyancy experienced in a spa relieves muscle tension, allowing your joints and muscles to relax and become more pliable. While soaking, you can take advantage of your relaxed state and your water-induced buoyancy to gently practice flexibility exercises.

This video offers some suggestions for gentle stretches that may be done in your hot tub. If you have mobility issues or any existing medical conditions, consult with your doctor before starting any exercise program:

Relief from the Symptoms of Arthritis and Rheumatoid Arthritis

Sufferers from medical conditions such as arthritis may find symptom relief with hot tub usage.

Arthritis is a common yet painful malady characterized by joint pain and swelling, accompanied by a decreased range of motion. Osteoarthritis, the most prevalent form, results from a loss of cartilage between bones, leading to pain caused by friction. Rheumatoid arthritis, an autoimmune disorder that can cause widespread pain throughout the body, occurs when a person’s own immune system mistakenly attacks their joints, resulting in swelling and stiffness. These conditions can cause chronic pain and reduce the quality of life.

Fortunately for sufferers of arthritis, spending time in your hot tub may provide temporary relief from arthritic joint pain. In a controlled study examining the effects of spa therapy on patients with severe osteoarthritis, researchers found significant reduction in pain after just two weeks. In fact, patients undergoing spa therapy experienced less pain than those undergoing drug therapy at the same time. Likewise, a study of patients with rheumatoid arthritis demonstrated that hydrotherapy reduced pain, tension, and joint tenderness.

While any medical decisions should be made in consultation with your doctor, for sufferers of arthritis or rheumatoid arthritis, a hot tub may be a pleasant method of temporarily reducing pain and improving your quality of life.

Relief from the Symptoms of Fibromyalgia

Akin to the way it might help people suffering from arthritis, spending time in your hot tub may also ease some symptoms of fibromyalgia. Fibromyalgia is a disorder involving chronic pain and fatigue throughout the body, often resulting in disturbed sleep and an impaired ability to focus or concentrate. It can cause disruptions at work and disturbances at home.

As with arthritis, a study of the effects of hydrotherapy on fibromyalgia patients showed demonstrable benefits. Following a course of hydrotherapy treatment, patients reported improvements in physical functionality, sleep quality, and the ability to do their jobs, accompanied by a reduction in pain intensity, fatigue, stiffness, anxiety, and depression.

Of course, these studies are limited in scope and should not be taken as medical advice. Before determining whether a hot tub can help you manage your fibromyalgia symptoms, consult with a qualified medical professional.

Medical studies show that hydrotherapy may temporarily relieve the pain of fibromyalgia sufferers.

Relief from Lower Back Pain

According to one estimate, 80% of all Americans will suffer from lower back pain at some point. Lower back pain, whether chronic or acute, can severely impact the quality of life. It can make performing everyday activities—going to work, driving, shopping, doing household chores—a difficult and painful challenge. It can also cause sleep loss. In multiple studies, people living with chronic back pain who underwent hydrotherapy treatment, either on its own or in combination with other treatments, saw a reduction in their symptoms. While these studies do indicate that hydrotherapy may positively impact people suffering from lower back pain, they do not replace the advice of a doctor or qualified medical professional. To see if hot tub usage may help ease your symptoms, consult your physician.

Lower back pain, which affects a majority of Americans at some point in life, may be eased by soaking in a hot tub.

Decreased Anxiety and Stress

How much of your day do you spend feeling stressed out? The hectic routines of everyday modern life can be a big source of anxiety: waking to an alarm, dealing with commuter traffic or overcrowded trains, fielding calls and emails at work, paying bills, taking care of the kids, putting dinner on the table, repairing your home, repairing your car, repairing your relationships… Wouldn’t it be nice to have a way to let it all go?

When you’re in your hot tub, nothing matters except how good you feel. Because it’s more energy efficient to keep your spa at a constant warm temperature instead of heating it up each time you use it, it’s always ready for you. Before you leave for work in the morning, soaking in your spa for fifteen or twenty minutes can help you begin your day feeling rested and focused. At night, it can help you unwind and leave the stresses of the long day behind you. Randomized and controlled studies have shown that the use of hydrotherapy can lead to an improved psychological and emotional state. The combination of warm water and soothing massage jets help work the tension out of your muscles. Your water-induced buoyancy also helps relieve muscle strain, allowing your body to relax as you float. Taking a little time each day to ground yourself in a soothing, comfortable place away from life’s many distractions allows you to focus and helps relieve symptoms of your anxiety.

Relief from stress and anxiety is a possible benefit of hot tub use.

Better Sleep

Approximately 132 million Americans suffer from insomnia or other sleep disorders more than once a week, according to the National Sleep Foundation. Lack of sleep can increase feelings of stress, anxiety, frustration, and depression while simultaneously reducing your ability to be productive. This can become a vicious cycle, as these same negative feelings can cause or aggravate many sleep disorders.

Using your hot tub on a regular basis can break that cycle and help you get to sleep. In a study of older female adults suffering from insomnia, the results indicated that soaking in hot water before bedtime leads to deeper, more restful, and more continuous sleep.

Reducing your stress and anxiety levels makes you more likely to fall asleep without difficulty. Simply soaking for a little while before you go to bed will relax your nerves and muscles, making it easier to sleep. In your hot tub, you’re in your own little world, far from the stress and worry of the day. After ares away, you can go to bed without the problems of yesterday and tomorrow racing through your head. In addition, an evening soak is the perfect time to connect with your family. Spending quality time with your loved ones on a regular basis can help you tune out stressful distractions and focus on what matters most in your life. With peace of mind comes a peaceful sleep.

Insomnia and other sleep disorders may be improved through hot tub use.

Eases Sore Muscles

America was built on hard work, and there are a lot of us out here still working hard today. Even if you’re not playing for the NFL, building houses, or climbing mountains, you may find yourself suffering from sore or aching muscles at the end of a long day. The daily routines of our jam-packed lives are more than enough to wear our muscles down. Outside of our day jobs, the strenuous physical labor continues: We work our muscles when we’re hitting the gym, hitting the bag, shooting hoops, or hiking trails. All that physical exertion, whether done for work or for recreation, takes its toll on the body.

Hot tubs can help you take that pain away. The hot water and massage jets release tension and knead the toxins from your muscle fibers. Buoyancy takes the pressure off your legs, feet, and back, helping you work out the kinks and knots. Soaking in a hot tub after a hard exercise session or a long day at work is the perfect way to help your muscles recover for the next day. However, before deciding on a spa as therapy or a replacement for your prescription, you should seek the medical advice of a qualified physician.

References

Loading

If the article is helpful, please Click to Star Icon and Rate This Post!
[Total: 0 Average: 0]

Hot Tub Therapy – Indications, Contraindications

Hot Tub Therapy/Hot tub hydrotherapy can be a luxury you indulge in once in a while or a daily practice to help lower stress, ease physical tension, nurture relationships, and inspire regular self-care. I know that by letting my hot tub stand at the center of my circle of wellness, I cultivate a constant commitment to good health, happiness, and the lifestyle I envision. You can do the same.

If you’re struggling with arthritis, hot tub hydrotherapy can help. There’s nothing like warm water to alleviate the stiffness, joint pain, and inflammation that are often associated with arthritis.

If you suffer from the uncomfortable or painful symptoms of arthritis, here is how hot tub hydrotherapy may be able to help.

Hot Tub Therapy for Arthritis

If you suffer from joint pain from arthritis, warm water can help your body to relax. This relaxation is the first step to letting go of muscle tension, leading to more flexibility and a better flow of oxygen through the bloodstream. Soaking in jet-driven water can also help ease many of the symptoms due to the warmth and buoyancy of the water.

The symptoms of arthritis that can be mitigated with hot tub hydrotherapy include:

  • Stiff joints
  • Tense muscles
  • Poor flexibility and range of motion
  • Pain and soreness

If you gently exercise while you’re in your hot tub, you can even improve your muscle strength and your circulation because the water provides resistance.

If you want to try exercising in your hot tub or spa, start off slowly until you find your comfort level. This will prevent you from having pain flare-ups. For example, you could try straight leg raises, leg kicks, and marching on the spot.

While hot tub hydrotherapy can help to ease some of the direct symptoms of arthritis, many are not aware of the indirect health benefits that can help to further promote better health. These can include better sleep patterns, fewer feelings of stress, improved muscle recovery, and even improved mental wellness through self-care, relaxation and more time spent with loved ones.

How to Make the Most of Your Hot Tub Therapy

Medical experts recommend soaking in the warm water for anywhere from 20 to 45 minutes. How long you soak in a hot tub will depend on a number of factors, including but not limited to your health, climate and personal preferences. You may want to speak with your doctor first to ensure hydrotherapy is right for you and how to best use it when treating the symptoms of arthritis.

If you’re using your hot tub for joint pain, the water temperature should be between 98 and 102 degrees Fahrenheit.

You can maximize your hot tub therapy by using the jets. This gentle massage boosts your circulation, eases tension, and relaxes your muscles. The combination of massage and warm water softens your soft tissues, making them more flexible, so movement becomes easier. Warm water also helps increase blood flow to stiff joints and muscles and can reduce swelling and inflammation.

Relaxing your Mind

When you are living with chronic pain, it’s not just your body that needs to relax, but also your mind.

Just sitting in your hot tub, listing to the gentle bubbling of the water, and breathing slowly can provide you with the perfect opportunity to meditate.

There’s nothing better than the combination of meditation and soothing warm water to help your tension melt away, so you can deeply relax.

The Benefits of Draining and Cleaning Your Hot Tub

Even though you treat, sanitize and shock your hot tub water regularly, you will need to replace it altogether at some point. Contaminants such as body oils and lotions, cosmetics, hair products, sweat, and dead skin are introduced into the water when the tub is used. These contaminants also get into the plumbing and filters, and can create a layer of bacteria that is hard to get rid of, called a biofilm.

You can only get rid of the biofilm by carefully draining and cleaning the hot tub using the right hot tub and plumbing cleaning products. Your hot tub is due for service/maintenance if it:

  • Emits bad odors
  • Has cloudy or murky water, even after treatment/shocking
  • Has been used by very many people in a short time-span
  • Has not been used for a long while e.g. after winter

Draining Your Hot Tub

Ensure the spa is disconnected from power before attempting any maintenance tasks. Start by adding a plumbing cleaning agent before draining your hot tub. The cleaner is specially made to break down biofilm buildup in the pipes and filters. It should sit/circulate for a while (check the package) – allow a few hours of circulation or even overnight before draining.

You can drain the tub by connecting a hose and allowing gravity to push out the water, but this can take hours. Alternatively, a sump pump can empty the hot tub in minutes. The wastewater should go into the sewer system, but some people drain into their backyards or gardens.

Cleaning Your Hot Tub

Clean or replace your filter while the tub is draining off – rinse thoroughly with clean water to remove the cleaning agents. Spray the shell with a hot tub cleaner and wash, paying attention to any nooks and crannies. Remove residues with soft microfiber cloths and rinse all surfaces thoroughly. You may also want to take this opportunity to clean your hot tub filter, along with other accessories such as the steps or cover. Drain the cleaning water the same way as the dirty spa water.

Refilling Your Hot Tub

Finally, add fresh water through a hose with a filter to reduce the volume of impurities. Always use high-quality water to reduce the risks of stains and mineral deposits. Stay close to avoid flooding, especially in indoor tubs.

Bringing Your Family Together

Life these days is so busy. With work, school, family, and so much more, it can be difficult to find any time to spend together. With a new 4-person hot tub or larger, for example, you’re sure to make some room for a little family soak. Talk to one another, catch up, and relax while you are doing it.

This is also a great way to sneak in a date night while the kids are in bed. It’s hard finding alone time when you have a family, and it is difficult to take a trip and leave the kids behind. There is no need to feel guilty when getting away to your back yard.

Stress Relief

Along with the busy days comes so much built-up stress. Having a 2-person hot tub on hand gives you easy access to stress relief. Soak in a hot tub with some wine and music download. Unwind and let the daily built-up stress melt away.

Regular Low-Impact Exercise

The Sundance® Spas brand offers a variety of hot tubs to help you get in your daily workout. Some people find it much easier on their muscles and joints to work out in the water. Now you can. Just contact your local Sundance® Spas dealership today.

Muscle Relief

Spending the day on your feet, or sitting at a desk, you are sure to have some serious muscle aches and pains. A great way to relieve these pains is by soaking them in nice warm water. Heating your muscles will ease the tension and soothe your entire body.

MUSCLE MASSAGE

Massage has proven physical and mental benefits. According to the University of Minnesota, massage provokes a relaxation response in the body’s nervous system. Massage also has positive effects on the body’s soft tissue and improves blood and lymph circulation, which allows oxygen to spread more easily through the body. Relaxing muscle tissue through jet massage can help ease contractions, spasms, and nerve compression. Water pressure on the body’s muscles and joints knead away knots and soothing sore spots.

RELAXATION

As muscles relax, the mind unwinds, shedding the stress and anxiety that can build over the course of a day. The relaxation responses to jet massage reduce stress, anxiety, hypertension, and help curb insomnia.

In addition, buoyancy reduces pressure on your muscles and joints, while heat encourages them to relax and expand. This combination helps soft tissue recover.

PERSONAL AND SOCIAL CONNECTIONS

Remember when social connections came from talking to people face to face instead of online? A home hot tub can help you step away from your mobile devices and spend quality time with friends and family. A spa can foster an atmosphere of intimacy, inviting people to open up and share their thoughts. In a spa, you can connect with old friends, get to know new neighbors, and solidify bonds with your partner and your children.

Improved Sleep Patterns

Most doctors would agree that getting seven to eight hours of sleep at night is extremely important to your health. A great way to do this is by soaking for about 20 in the tub right before you head to bed.

Grab your oil diffuser and lavender, and get ready for a new bedtime routine.

Revitalize Your Outdoor Living Space

Sometimes you just want to be the talk of the town. Give your home some curb appeal. Nothing will get neighbors more jealous than coveting the new hot tub sitting in your backyard. Adding a 6-person hot tub to your backyard could even help you make those neighbors your new friends.

HOT TUB THERAPY HOW DOES IT WORK?

Hot tub therapy is a tried-and-true method of relieving stress, relaxing muscles, and experiencing renewal through warm water immersion. It is an ancient practice. People have been enjoying warm water immersion for centuries. Ancient Egyptians, Greeks, and Romans, for example, built palaces around natural hot springs. Over time, as the benefits of soaking were realized more, marvelous engineers created artificial hot springs for communal and personal use. While jets were first introduced to hot tubs in the 1950s, today’s high-quality spas feature carefully designed massage jet systems that deliver targeted and measured pressure to muscles and sore spots in the body.

WARM WATER, BUOYANCY, AND ADVANCED JET SYSTEMS WORK IN TANDEM

Hot tub therapy relaxes muscles and improves blood flow. At the same time, buoyancy in water reduces body weight by 90%, which can reduce pressure on joints and inflammation while helping to put the mind at ease. The combination of warm water immersion, buoyancy, and advanced hot tub jets provide a total-body therapeutic experience. As the warm water reduces tensions, the spa jets massage away the knots and aches in your muscles just like a gifted masseuse.

Because today’s high-quality jet systems target specific muscle groups, by adjusting your spa’s settings, you can focus on the areas of your body that need the most attention. Similarly, you can control the amount of pressure coming through the jets, so you’re always able to find just the right touch for you.

Tranquility in a spa on a summer day.

A hot tub can help relieve chronic pain and improve range of motion, elevate mood, reduce mental and physical tension, improve social and personal connections, and increase the overall quality of life. As warm water improves circulation and massage free your muscles from strain, your body can enter a restful state, where it is able to heal and recover depleted reserves of energy. Let’s take a more detailed look at the benefits of hot tub therapy.

Who should avoid hot tubs?

If you have any concerns about using a hot tub, it’s worth having a conversation with your doctor. This is especially important in the following situations:

  • Heart disease. Soaking in a hot tub can affect heart rate and blood pressure. This may be beneficial to some people with cardiovascular concerns but could be unsafe for others.
  • Pregnancy. It’s easy to get overheated when you’re pregnant, which can be harmful to you and your baby.

You may also want to avoid a hot tub if you have:

  • Skin injuries. Wait until cuts, open sores, or rashes have healed to reduce the risk of irritation and infection.
  • Low blood pressure. If you’re prone to lightheadedness or fainting, you should probably avoid the hot tub as the hot water could lower your blood pressure further.
  • Urinary tract infection (UTI). Exposure to hot water when you have a UTI may worsen your symptoms.

Not all hot tubs are created equal. Some are in-ground and designed simply and rigidly to accommodate a lot of use, like those you may find at resorts or hotels. Some have fancy lights and a lot of jets designed to be eye-catching, while others are designed from the ground up with genuine hydrotherapy in mind. These hydrotherapy spas are manufactured after intensive research and development to provide:

  • Ergonomic seats and lounging spaces for exceptional comfort
  • Powerful pumps and a variety of massaging jets that effectively target specific muscle groups
  • Comprehensive and easily accessible controls that allow customization of your hydrotherapy massage
  • A reliable water care system for an overall soothing spa experience and stress-free maintenance

If you’re seeking the ultimate therapeutic experience, you need to know what to look for in the best hydrotherapy hot tubs and how to get the greatest value for your investment.

What Defines the Best Hydrotherapy Hot Tub?

Hydrotherapy is a combination of clear, temperature-controlled water and hydro jets designed to massage your muscles as you relax in a buoyant state. Regular hydrotherapy may help temporarily relieve some symptoms associated with osteoarthritis, rheumatoid arthritis, sleep disorders, and pain and tension in the lower back and other areas. To enjoy the wellness benefits of hydrotherapy, choose a top-performance spa with the right combination of functions and features.

The best hydrotherapy spa for all your needsThe best spa designers are hot tubbers, so they understand the importance of comfort and hydrotherapy massage. But how can you distinguish between the features you need and those you don’t, and between hot tubs that appear relaxing and those that really are the best for hydrotherapy? Let’s start by looking at some of the most important hot tub features for therapeutic benefit.

Jets

When considering the jet options of the hot tub model you have in mind, remember that the overall number of jets matters much less than their placement and design for effective massaging action.

A variety of jet types are most effective because different body areas require different types of massage for tension relief. The jets must be strategically coordinated with the seating to target specific muscle groups effectively, and the pump must be powerful enough to move water through the jets efficiently.

Adaptability

Your hot tub soak will be most enjoyable and therapeutic when you can customize your experience for ultimate comfort. Hot tubs with a comprehensive control panel allow you to adjust the temperature of the water, the ambiance (light, water, and music features), and the flow and intensity of the jets with simple adjustments to air and diverter valves.

In addition to offering hot water therapy, spas with a cold water therapy option, such as the CoolZon system, allow you to efficiently lower water temperature to as much as 60 degrees Fahrenheit.

Fit

All the innovative features and exceptional performance of a hot tub won’t mean much if the spa is not a good fit for you. The seats should feel comfortable, supportive, and should align with the hydro jets.

For an in-depth look at hydrotherapy hot tub seating options and the importance of comfort, see our detailed guide to spa seating. Then, be sure to visit your nearest dealer showroom for a dry sit or a test soak to ensure comfort and fit, and to experience hot tub hydrotherapy firsthand.

What Will a Hydrotherapy Hot Tub Mean for Your Life?

Twenty minutes of hydrotherapy each day can change your life. Your home spa can complement current healthy routines and inspire new ones. Because a quality hot tub is versatile and easy to personalize, you can create the perfect hydrotherapy environment for your needs in the moment. One day you might need a simple, soothing soak for stress relief, and the next you might want an invigorating 20-minute soak before exercise.

An energy-efficient hot tub maintains your ideal temperature even when not in use, so it’s ready whenever you want a hydrotherapy soak. Energy-efficient technology makes it easy to enjoy your spa daily, reap the most health benefits from your investment, and can even save you thousands of dollars over the life of your hot tub. When you choose the very best hydrotherapy hot tub, you’re investing in your own optimal health and well-being.

References

Loading

If the article is helpful, please Click to Star Icon and Rate This Post!
[Total: 0 Average: 0]

Sacroiliac Joint Tests – Uses, Indications, Types, Procedure

Sacroiliac joint tests include discussing your history and pain experience, a physical examination, tests to rule out other sources of pain, like lumbar spine pain and hip pain, and these commonly accepted methods:

It’s often difficult to diagnose sacroiliac (SI) joint dysfunction, especially since the main symptom is low back pain, which is common to many different painful spinal disorders. In fact, SI joint dysfunction occurs more frequently than many doctors realize. And sometimes it is difficult to differentiate between low back pain and hip pain. There are various exams and tests that can help determine whether you have SI joint dysfunction.

Anatomy

It is the largest axial joint in the body. The size, shape, and surface contour shows wide individual variation. SIJ is an auricular or C- shaped joint. It lies between the first to the third sacral vertebrae. Only the anterior portion is a synovial joint and the posterior portion contains the strongest ligament in the body, the interosseous sacroiliac ligament. The innominate side is covered by fibrocartilage and the sacral side is covered by articular cartilage. The cartilage of the sacral side is thicker than the iliac side. The sacral side has a central depression and the innominate side has a central ridge.

The stability of the sacroiliac joint is provided by the sacroiliac ligaments and accessory ligaments. The sacroiliac ligaments are the anterior and posterior sacroiliac ligaments and the interosseous ligaments. The ligaments are thicker posteriorly than anteriorly. Anterior sacroiliac ligaments are thickenings in the joint capsule. Interosseous ligaments are the most important and have superficial and deep portions which in turn are divided into superior and inferior bands. Posterior ligaments connect the lateral sacral ridge and the posterior iliac spine and iliac crest. The Accessory ligaments include the iliolumbar, sacrotuberous, and sacrospinal ligaments.

The structure of the sacroiliac joint evolves with the age of the person. These changes begin after puberty and continue through one’s lifetime. During adolescence, the iliac side becomes rougher and develops areas of fibrous plaques. The changes accelerate after the third and fourth decade with surface irregularities, fibrillation, and crevice formation. Sacral side changes begin 10-20 years after the iliac side changes. The joint develops fibrous ankylosis by the sixth decade. Erosions and plaque formation become widespread by the eighth decade.

The innervation of the sacroiliac joint is not yet clearly established. As per various reports, the posterior part of the joint is innervated by branches from the dorsal rami of L3- S3, and the anterior third is innervated by branches from the ventral rami of L2-S2. Innervation from multiple segments leads to referral of pain from sacroiliac joint to different anatomical regions and diverse pain patterns can be observed. But the pain from SIJ does not refer to areas above L5.

Biomechanics

The primary function of the sacroiliac joint is to provide stability. It transmits the weight of the trunk to the lower limbs. It is weak in torsion and axial compression. The sacroiliac joint provides only small degrees of movement in all 3 axes. In males, the movement is predominantly translational and in females it is rotational. Movements are more in females.

Forward rotation of the sacrum at the SIJ is called nutation. During nutation, the sacral promontory moves anteriorly and inferiorly and the coccyx moves posteriorly and superiorly. This leads to a decrease in the anteroposterior width of the pelvic brim and an increase in the anteroposterior width of the pelvic outlet. The backward rotation of the sacrum with opposite effects is called counter-nutation. These movements are probably important during childbirth.

History

Pain in the sacroiliac region may be either due to localized causes or referred causes. Pain over the SIJ may be referred from an intervertebral disc or facet joint lesions. In addition, the pain of sacroiliac joint lesions may radiate to the buttock, lower lumbar region, or buttock. Hence it is often difficult in many patients to identify the exact source of pain.

The cause of the pain may be intra-articular or extra-articular. Intra-articular causes may be arthritis, infection, or trauma. Extra-articular causes may be enthesopathy, fractures, ligamentous injury, or lesions of adjacent ilium, sacrum, or soft tissue structures. Causes may be classified as an inflammatory disease, infection, tumor, metabolic disorders, degenerative disease, iatrogenic conditions, referred pain, and trauma.

Limb length discrepancy, abnormal gait, prolonged exercise, or scoliosis may lead to mechanical derangement of the sacroiliac joint leading to pain. Pregnancy is a well-known risk factor for sacroiliac pain due to weight gain, excessive lumbar lordosis, injury during delivery, and hormone-induced ligamentous laxity.

Symmetrical or asymmetrical sacroiliitis is a common finding in spondyloarthropathies.   Ankylosing spondylitis commonly causes symmetrical involvement and other spondyloarthropathies lead to asymmetrical involvement.

Examination and Manual Test of Sacroiliac joint tests

Many of the problems of the sacroiliac joint are missed and often attributed to hip or spine disease as the history and clinical tests are often nonspecific. Careful physical examination is needed for proper diagnosis.  Point-specific tenderness at the sacral sulcus or posterior superior iliac spine is a consistent finding in sacroiliac joint lesions. Tests for sacroiliac joint can be divided into motion palpation tests and pain provocation tests. Gillet test is the most commonly done motion palpation test.

The

Gillet test

Patient position- Standing.

Examiner position- Standing behind the patient, with one thumb over the S2 spinous process and the other thumb over the posterior superior iliac spine (PSIS) of the tested side.

Procedure- Ask the patient to maximally flex the hip on the tested side.

Interpretation- Normally PSIS moves inferiorly in relation to the S2 spinous process. If it remains at the same level then there is SIJ dysfunction.

The provocative tests done for the sacroiliac joint do not test the sacroiliac joint alone; hence lesions in the adjacent structures also will elicit a positive test. This is the main reason for lack of specificity for these tests.

Sacroiliac distraction test

Patient position- supine on a couch.

Examiner position- Standing with each hand placed over the anterior superior iliac spine on either side.

Procedure- Apply posterior directed force to distract the sacroiliac joint.

Interpretation- Pain at the sacroiliac region is suggestive of sacroiliac pathology.

Thigh thrust test

Patient position- supine on a couch with the hip and the knee flexed to 900 and the hip slightly adducted.

Examiner position- Standing with one hand placed over the sacrum and the other upper limb wrapped around the knee.

Procedure- Apply posterior directed force to the vertically oriented femur to apply a shearing force on the sacroiliac joint.

Interpretation- Pain at the sacroiliac region is suggestive of sacroiliac pathology.

Gaenslen’s test

Patient position- Supine with one limb hanging over the edge of the couch.

Examiner position- Standing.

Procedure- Maximally flex one lower limb onto the abdomen and maximally extend the other hip hanging beyond the edge of the couch.

Interpretation- Pain at the sacroiliac region is suggestive of sacroiliac pathology.

Sacroiliac compression test

Patient position- Lateral position with hip and the knee bend to 900.

Examiner position- Standing with both hands placed on the iliac crest.

Procedure- Apply firm pressure on the iliac crest.

Interpretation- Pain at the sacroiliac region is suggestive of sacroiliac pathology.

Patrick test or FABER (Flexion-Abduction-External rotation- Extension) test or Figure 4 test

Patient position- Supine

Examiner position- Standing.

Procedure- Ask the patient to keep the hip in flexion-abduction-external rotation position, knee in 900 flexions with the foot resting on the opposite limb. Apply pressure on the knee to force the hip into extension.

Interpretation- Pain felt in the region of SIJ is suggestive of SIJ lesions.

RAB (Resisted abduction) test

Patient position- Supine.

Examiner position- Standing holding the patient’s leg at the ankle.

Procedure- Ask the patient to abduct against resistance.

Interpretation- Pain felt in the region of SIJ is suggestive.

Sacral thrust test

Patient position- Prone position.

Examiner position- Standing with both hands placed on the sacrum.

Procedure- Apply firm pressure on the sacrum.

Interpretation- Pain at the sacroiliac region is suggestive of sacroiliac pathology.

Yeoman test

Patient position- Prone position.

Examiner position- Standing and holding the patient’s tested lower limb at the knee.

Procedure- Hyperextend the hip.

Interpretation- Pain at the sacroiliac region is suggestive of sacroiliac pathology.

The thigh thrust test is most sensitive and the distraction test is the most specific. Only the thigh thrust test reaches more than 80% sensitivity and specificity. In the absence of centralization, if three provocative tests are positive then the sensitivity, specificity, and positive likelihood ratio are 93%, 89%, and 6.97%, respectively. Hence practically it is sufficient to do the thigh thrust test, sacroiliac distraction test, and the FABER test to arrive at a diagnosis.

References

Loading

If the article is helpful, please Click to Star Icon and Rate This Post!
[Total: 0 Average: 0]

Yeoman’s Test – Uses, Indications, Procedure, Technique

Yeoman’s test is a physical exam performed to determine if a person has sacroiliitis. With the subject prone, the test is performed by rotating the ilium with one hand and extending the hip while the knee is flexed. Pain over the ipsilateral posterior sacroiliac joint area is indicative of sacroiliitis.

This also tests for sacroiliac joint sprain or strain.

Purpose

Tests for Sacroiliac Joint involvement. More specifically, if the pain is in the sacroiliac region it may be related to anterior sacroiliac ligament pathology. If it is in the thigh it may be related to hip musculature tightness or femoral nerve tension and if it is in the lumbar region it may be due to lumbar involvement[rx]

Use: To assess for lumbar joint dysfunction.

Technique

Starting Position

The patient lies prone

Procedure

The examiner stands at the painful side and flexes the patient’s knee to 90° and extends the hip

To perform the test, the patient lies on their stomach.  The examiner uses one hand to stabilize the pelvis while the other hand lifts the leg off the table.  If the patient has pain over the buttock, it may suggest SI joint pain.  If the pain is in the front of the thigh, it may suggest nerve pain from stretching the femoral nerve.  Back pain may indicated pain coming from the lumbar spine.

Positive Test

Pain localized to the sacroiliac joint indicates pathology in the anterior sacroiliac ligament

Anterior thigh paresthesia may indicate a femoral nerve stretch[rx][rx]

Evidence

The thigh thrust test is most sensitive and the distraction test is the most specific. Only the thigh thrust test reaches more than 80% sensitivity and specificity. In the absence of centralization, if three provocative tests are positive then the sensitivity, specificity, and positive likelihood ratio are 93%, 89%, and 6.97%, respectively. Hence practically it is sufficient to do the thigh thrust test, sacroiliac distraction test, and the FABER test to arrive at a diagnosis.[rx][rx]

References

Loading

If the article is helpful, please Click to Star Icon and Rate This Post!
[Total: 0 Average: 0]

Slump Test – Uses, Indications, Procedure, Technique

Slump test is a laboratory or at-site test used to measure the consistency of concrete. The slump test shows an indication of the uniformity of concrete in different batches. The shape of the concrete slumps shows the information on the workability and quality of concrete. The characteristics of concrete with respect to the tendency of segregation can be also judged by making a few tamping or blows by tapping a rod on the base plate. This test continues using since 1922 due to the simplicity of apparatus and simple procedure. The shape of the Slump cone shows the workability of concrete.

slump test measures the consistency of fresh concrete before it sets. It is performed to check the workability of freshly made concrete, and therefore the ease with which concrete flows. It can also be used as an indicator of an improperly mixed batch. The test is popular due to the simplicity of apparatus used and simple procedure. The slump test is used to ensure uniformity for different loads of concrete under field conditions.[rx]

A separate test, known as the flow table, or slump-flow, test, is used for concrete that is too fluid (non-workable) to be measured using the standard slump test because the concrete will not retain its shape when the cone is removed.

Purpose

The Slump Test is a neural tension test used to detect altered neurodynamics or neural tissue sensitivity. The purpose of this test is to place tension on the dural sheath of the sciatic nerve.

Technique

The slump test is described differently among sources. The common factor among sources is the reproduction of pain as tension is applied to the dura during testing. The technique depicted below is adapted from Mark Dutton.

Description

To begin the test, have the patient seated with hands behind back to achieve a neutral spine. The first step is to have the patient slump forward at the thoracic and lumbar spine. If this position does not cause pain, have the patient flex the neck by placing the chin on the chest and then extending one knee as much as possible.

If extending the knee causes pain, have the patient extend the neck into neutral. If the patient is still unable to extend the knee due to pain, the test is considered positive.

If extending the knee does not cause pain, ask the patient to actively dorsiflex the ankle. If dorsiflexion causes pain, have the patient slightly flex the knee while still dorsiflexing. If the pain is reproduced, the test is considered positive. Repeat test on the opposite side. Over-pressure can be applied during any of the test positions.

Apparatus for Slump test

The followings apparatus are used in the slump test of concrete:

  • Metallic mold in the shape of a frustum of a cone having bottom diameter 20 cm (8 in), top diameter 10 cm (4 in), and height 30 cm (12in).
  • Steel tamping rod having 16 mm (5/8 in) diameter, 0.6 m (2 ft.) long with bullet end.

Procedure

The patient should be sitting on the edge of the table while the examiner is by the side of the patient.

The slump test consists of several different steps:

  • First, the patient slumps forward, rounding the shoulders[rx] so the examiner will then apply pressure to the trunk flexion.
  • Next, the patient brings chin to chest and the knee is then actively extended.
  • Afterward, the ankle is dorsiflexed. If pain is produced during any of the steps the examiner does not have to continue the test.

The test has several modifications all of which use different sequences of motions that create tension on the dural sheath.[rx]

or

During the Slump test following steps are followed:

  • First of all, the internal surface of the mold is cleaned and free from moisture and free from other old sets of concrete.
  • Then place the mold on the smooth horizontal, rigid, and non-absorbant surface.
  • The mold is then filled with fresh concrete in four layers with taping each layer 25 times by taping rod, and level the top surface with a trowel.
  • Then the mold is slowly pulled in vertical and removed from concrete, so as not to disturb the concrete cone.
  • This free concrete deform all the surface to subside due to the effect of gravity.
  • That subsidence of concrete in the periphery is a SLUMP of concrete.
  • The height difference between the height of subsidence concrete and mold cone in mm is ‘slump value of concrete.

Results

The positive sign is any kind of sciatic pain (radiating, sharp, shooting pain) or reproduction of other neurological symptoms. This indicates impingement of the sciatic nerve, dural lining, spinal cord, or nerve roots.[rx] This test can have a lot of false positives and should be used with another orthopedic test to make the final diagnosis.


Evidence

Some caution is needed as the diagnostic accuracy of the slump test is under debate! During the slump test,[3]the neural structures within the vertebral canal and foramen are slowly and progressively put on maximum stretch. A recent Cochrane review (on physical examination for lumbar radiculopathy due to disc herniation in patients with low-back pain), also looked at the available data on the Slump test.[rx] The authors listed two studies[rx] that reported results on the slump test. Stankovic et al (1999) present the results of the slump test at different cut-off values (angles at which pain occurred), showing that sensitivity of the slump test was poor (0.44, 95% CI:0.34 to 0.55), and specificity only slightly better (0.58, 95% CI:0.28 to 0.85) when using a strict cut-off (pain radiating below the knee). Sensitivity increased (but specificity decreased) when using a milder cut-off (pain anywhere).[rx] Majlesi et al (2008) reported similar sensitivity (0.84), but higher specificity (0.83), using an unknown cut-off for a positive test result.[rx] So it was not clear when a test was scored as “positive”. Also, the higher specificity might partly be the result of the case-control design of this study: patients with back pain were selected as controls if MRI findings were completely normal.

References

Loading

If the article is helpful, please Click to Star Icon and Rate This Post!
[Total: 0 Average: 0]

Bragard’s Sign Test – Uses, Procedure, Technique

The Bragard’s sign (also: Braggard’s test) is a manual test to diagnose and used to evaluate whether lumbar and​/or ischiatic pain originates from lumbosacral radiculopathy, disc herniation, sciatica, low back pain, cauda equina syndrome, slipped disc, etc.

Meniscal injuries may be the most common knee injury. Meniscus tears are
sometimes related to trauma, but significant trauma is not necessary. A
sudden twist or repeated squatting can tear the meniscus. A torn
meniscus is one of the most common knee injuries. Any activity
that causes you to forcefully twist or rotate your knee, especially when
putting the pressure of your full weight on it, can lead to a torn
meniscus.

Purpose

The Bragard’s sign (also: Braggard’s test) is used to evaluate whether lumbar and/or ischiadic pain originates from lumbosacral radiculopathy (e.g. disc herniation causing nerve root compression). Perform a straight leg raise and then lower the leg below the point of pain and passively dorsiflex the ankle. The test is positive if this reproduces the patient’s pain.

Technique

The procedure used to determine whether the source of lower back pain is nervous or muscular. A straight leg raising procedure is done; if positive the leg is lowered just below the point of pain and then the ankle is dorsiflexed. If pain increases during dorsiflexion, pain is likely nervous in origin, whereas, with no increase, the source is presumed muscular.

The patient is in the supine position. The examiner lifts the straight leg passively into hip flexion until the familiar pain occurs (Straight Leg Raise test/Lasegue’s Sign). Subsequently, the leg is lowered just below the pain threshold and the foot is pulled in dorsiflexion. If the familiar pain occurs again, the Bragard’s sign is positive. This would indicate a nervous involvement in the patient’s pain’s origin.

Evidence

In a study with 506 patients, Homayouni et al. investigated the sensitivity and specificity of Bragard’s sign for the differentiation of lumbosacral radiculopathy[rx]. They reported acceptable test performance-especially in patients with symptom duration of fewer than three weeks since the Straight Leg Raise test sensitivity and specificity decreased as sensitivity and specificity of the Bragard’s test increased.

Sensitivity Specificity
Bragard’s sign 69.3 76.42

Testing in clinical practice

Clinical examination tests work best when used in a combination of three to five tests, this is especially true for sacroiliac joint dysfunction, lumbar and/or ischiatic pain[rx]. For a schedule of which signs to look for in different spinal diseases follow this link. Examples of further tests include for the lumbar region are

Clinical Examination

All participants were referred by physicians other than those who performed the study. One physical medicine and rehabilitation specialist blinded to all outcome data visited all eligible participants and performed the physical examinations. The standardized clinical examination consisted of L5, S1 dermatomal sensory testing through softly striking the skin bilaterally and simultaneously. The patient, with eyes closed, was asked if the feeling clearly differed between the left and right sides, L5, S1 myotomal muscle strength (by testing muscle strength during big toe extension and ankle plantarflexion in supine position against resistance compared with nonsymptomatic side), and determination of Achilles stretch reflexes (noticing reflex diminution or abolishment) and muscle wasting (by measuring calf circumference and providing 1 cm difference with nonsymptomatic side for a positive test result). There were intervals of 5 minutes’ rest between diagnostic tests to allow the patients to recover from any pain or discomfort induced during the examination. The order of test performance (SLR or Modified Bragard test) was also randomly alternated to prevent testing bias.

Assessment Procedures

The SLR test was performed by having the patient lie down on a flat examination table in a supine position. Both hips and knees of the involved leg were maintained in a neutral position neither abducted nor adducted. The patient’s head was not supported by a pillow. The examiner grasped the patient’s heel in the cup of his hand. The examiner’s other hand maintained the patient’s knee in an extended position. The examiner slowly raised the tested leg up to 90° by flexing the hip while maintaining the knee in extension and keeping the limb neutral, neither externally nor internally rotated. The maneuver was positive if the patient complained of reproduction of symptoms distal to the knee joint, between 30° and 70° of hip flexion. An angular goniometer with a degree of error equal to ±1° was applied at the level of the greater trochanter to measure the value of hip flexion.

When a structural abnormality such as a herniated disk compresses the nerve root proximal to or at the neural foramen, pain may occur. This may lead to pain radiating down the leg in the appropriate nerve root distribution (generally L5, or S1). The exact cause of the pain is unknown, but the symptoms may be related to decreased blood flow in the nerve root, increased tension of the nerve, compression of the nerve root, nerve root irritation, or other causes. The reproduction of back pain only or thigh pain (not extending distal to the knee) was considered a negative test.

The Modified Bragard test was performed in the following manner. The patient was positioned supine on the examination table with both legs straight. The examiner began with the SLR test. If the patient sensed no radicular pain or symptoms despite 70° hip flexion (negative SLR test), the foot was dorsiflexed firmly, and if radiating pain below the knee was produced, the Modified Bragard test result would be recorded as positive. The test is based on the hypothesis that combining hip flexion and knee extension with ankle dorsiflexion will increase the examiner’s capacity to provoke nerve root/sciatic signs and symptoms in SLR-negative patients.

Electrodiagnosis (EDx) served as the reference criterion for lumbosacral radiculopathy. All the eligible participants underwent the same standardized electrophysiologic examination by a board-certified physiatrist with 10 years of postgraduate experience by the same instrument (Medelec Synergy VIASIS, Surrey, England) in the same session as physical examination was performed without any time interval. She was unaware of the patients’ physical examination at the time of enrollment.

The EDx was considered positive according to standardized diagnostic criteria: (A) positive sharp waves or fibrillation potentials (in 1-limb muscle plus lumbar paraspinal muscles at the corresponding level, or in 2-limb muscles innervated by the same nerve root), (B) remodeled motor unit action potentials (high-amplitude, long-duration or polyphasic motor unit action potentials increased more than 30% in at least 2 muscles of 1 myotome innervated by the same myotome but by separate peripheral nerves), or (C) prolonged soleus H reflexes.

All nerve conduction study procedures were performed in accordance with the guidelines for measurement, temperature, safety precautions, and electrode placement. Motor and sensory nerve conduction studies were carried out first, and after that, H-reflex testing of the soleus and electromyography were conducted. The H reflex was used to evaluate the status of the peripheral nervous system with respect to proximal peripheral nerve conduction and potential entrapment of the nerve roots, such as radiculopathies. To perform soleus muscle H-reflex testing, the patient was positioned comfortably in a prone position with the feet off the edge of a plinth. A pillow was placed beneath the legs to cause slight knee flexion. The active electrode was located in the bisected line between the mid-popliteal fossa and the Achilles tendon, and the reference electrode was located over the Achilles tendon when the ground electrode was placed between the stimulus and recording electrode. A sweep speed of 10 ms/div, amplifier sensitivity of 500 μV/div, and pulse duration of 1.0 ms were used. The cathode of the stimulator was placed in the mid-popliteal fossa with the anode distal. The stimulus was delivered at a rate of 1 stimulation every 2 to 3 seconds. The current intensity was slowly increased until the H-reflex magnitude was maximized without concomitant activation of the motor fibers. Several responses were noted at this stimulus level to ensure a reproducible and stable response. The latency was then recorded to the initial departure of the H reflex from the baseline. A side-to-side difference of 1.5 ms was used as a prediction of an S1 radiculopathy. H-reflex latency prolongation or side-to-side differences probably indicate neural demyelination with significant damage of the large-diameter nerve axons.

References

Loading

If the article is helpful, please Click to Star Icon and Rate This Post!
[Total: 0 Average: 0]

Reverse Flip Test – Uses, Indications, Procedure, Technique

Reverse flip test is a manual test to diagnose for PLID, slip disc, disc herniation in lumbar spine while raising the leg, the foot is held in a plantar-flexed position; this will lessen the pain. But if the patient is complaining of an increase in pain, it can suggest malingering.

Sciatica is a common complaint at our clinic and has been the topic of sciatic blogs. As we’ve mentioned in the past, there are various causes for “sciatic” symptoms. These causes can include a lumbar disc injury (herniation) or lumbar stenosis to name a few. The symptoms of sciatica can range from leg pain, numbness, tingling, pins, and needles, sharp pain, and also dull throbbing pain. Quite often, the challenge is to determine where and why the nerve is compressed or irritated. 

Clinical History and Examination

The journey toward sciatica diagnosis starts with a clinical history and examination. On occasion, advanced tests like MRI, CT or nerve conduction is required, but under most circumstances, we try to avoid tests that won’t change the course of treatment. This is why the initial orthopedic examination is very important and the application of orthopedic tests requires a keen knowledge of the reliability of the different tests. Perhaps this blog entry is more for the practitioners out there… 

The Flip Test Procedure

The Flip test has traditionally been used to determine whether there is nerve tension (nerve irritation related to a spinal condition like a disc herniation). This test is similar to a slump test. To perform the Flip test, the patient sits on the edge of a table with the legs dangling. The painful/symptomatic leg is extended and if the patient puts their hands on the table and “flips” backward, the test is positive. Surprisingly, this test has never really been tested in a scientific setting!  This seems to occur often, where an idea persists for so long that it becomes accepted as fact, regardless of there not being any true scientific study performed. 

A study published in the Journal Spine (2009) investigated whether the flip test was reliable for finding nerve root tension. The subjects in the study were patients with confirmed nerve compression on MRI. Interestingly, the authors of the paper found that the flip test wasn’t quite as reliable as many would think. Unfortunately, only a third of the patients displayed a positive “flip” while another third didn’t even react at all. Keep in mind; this is all on patients with confirmed nerve impingement!  So what does this mean for patients and practitioners?  As with most orthopedic tests, an astute clinician needs to combine the findings of the history as well as using more than one orthopedic test. Sometimes a test may not be reliable on its own, but when used in conjunction with a battery of tests it can help diagnose a person’s condition.

If you’re not a practitioner you’d probably find this blog entry confusing. Perhaps then the take-home point for any patients reading this entry is that if you have sciatic symptoms (numbness, tingling, pins and needles) a knowledgeable practitioner can perform an examination that helps to determine the source of pain. Once that has been achieved a course of treatment can be outlined.

References

Loading

If the article is helpful, please Click to Star Icon and Rate This Post!
[Total: 0 Average: 0]

Bowstring Sign – Uses, Indications, Procedures, Result

Bowstring sign is also known as the popliteal compression test or posterior tibial nerve stretch sign. The patient can be examined in sitting or in a supine position. The examiner flexes the knee and applies pressure on the popliteal fossa, evoking sciatica. Some examiners do it after SLRT by flexing the knee to relieve the buttock pain. The pain would be reproduced by a quick snap on the posterior tibial nerve in the popliteal fossa.

Purpose

Bowstring sign is a passive provocative clinical test that is performed in patients presenting with low back pain to determine the lumbosacral nerve tension. It is also known as the popliteal compression test or posterior tibial nerve stretch sign.[rx]

Technique

The patient begins lying supine with the legs extended while the examiner performs a passive straight leg raise on the involved side. If the patient reports radiating pain, the examiner then flexes the patient’s knee until symptoms are reduced. The examiner then applies pressure to the popliteal fossa to try to reproduce the radicular pain.

Patient Position

Patient in supine lying position without a pillow.

Therapist Position

Examiner stands at the tested side with a face facing towards the patient’s face.

Procedure

  • Initially, the examiner performs the Straight Leg Raise ( SLR) test in which the examiner lifts the leg with the extended knee. Examiner raises the leg to the point where the patient perceives pain along with the distribution lumbosacral dermatomal level or when maximum flexion is got.
  • While performing the SLR test, at the point of maximum pain (positive SLR) the examiner will slightly flex the patient’s knee approximately 20 degrees thereby reducing the pain.
  • Then examiner applies pressure (via thumb) on the popliteal fossa on the sciatic nerve (posterior tibial nerve).
  • If this elicits the same pain as the patient experiences during SLR, then the Bowstring sign is said to be positive.[rx]
  • This test should be performed on both legs, the normal side being the first.

Evidence

  • The bowstring sign is one of the commonly used variants of the SLR test and a study published in 2020 suggests using SLRT, Femoral nerve tension test, Slump test, and bowstring test in combination. This takes about 2 minutes and could improve both the sensitivity and specificity of the physical examination for the diagnosis of sciatica.[rx]
  • There is no evidence regarding the psychometric properties of the Bowstring sign.

Positive test Result

  • Reproduction of pain with popliteal compression implies sciatic nerve pathology.

References

Loading

If the article is helpful, please Click to Star Icon and Rate This Post!
[Total: 0 Average: 0]

Physical Activity – Anatomy and What You Need To Know

Physical Activity is defined as any bodily movement produced by skeletal muscles that result in energy expenditure. The energy expenditure can be measured in kilocalories. Physical activity in daily life can be categorized into occupational, sports, conditioning, household, or other activities. Exercise is a subset of physical activity that is planned, structured, and repetitive and has as a final or an intermediate objective the improvement or maintenance of physical fitness.

How much physical activity should children and young people aged 5 to 18 do to keep healthy?

Children and young people need to do 2 types of physical activity each week:

  • aerobic exercise
  • exercises to strengthen their muscles and bones
Children and young people aged 5 to 18 should:

  • aim for an average of at least 60 minutes of moderate-intensity physical activity a day across the week
  • take part in a variety of types and intensities of physical activity across the week to develop movement skills, muscles, and bones
  • reduce the time spent sitting or lying down and break up long periods of not moving with some activity. Aim to spread activity throughout the day. All activities should make you breathe faster and feel warmer

What counts as moderate activity?

Moderate intensity activities will raise your heart rate, and make you breathe faster and feel warmer.

One way to tell if you’re working at a moderate intensity level is if you can still talk, but not sing.

Examples of moderate-intensity activities:

  • walking to school
  • playground activities
  • riding a scooter
  • skateboarding
  • rollerblading
  • walking the dog
  • cycling on level ground or ground with few hills

What activities strengthen muscles and bones?

Examples for children include:

  • walking
  • running
  • games such as tug of war
  • skipping with a rope
  • swinging on playground equipment bars
  • gymnastics
  • climbing
  • sit-ups, press-ups and other similar exercises
  • basketball
  • dance
  • football
  • rugby
  • tennis

Examples for young people include:

  • gymnastics
  • rock climbing
  • football
  • basketball
  • tennis
  • dance
  • resistance exercises with exercise bands, weight machines or handheld weights
  • aerobics
  • running
  • netball
  • hockey
  • badminton
  • skipping with a rope
  • martial arts
  • sit-ups, press-ups and other similar exercises

Key Messages for Physical Activity

  • Regular physical activity promotes growth and development and has multiple benefits for physical, mental, and psychosocial health that undoubtedly contribute to learning.
  • Specifically, physical activity reduces the risk for heart disease, diabetes mellitus, osteoporosis, high blood pressure, obesity, and metabolic syndrome; improves various other aspects of health and fitness, including aerobic capacity, muscle and bone strength, flexibility, insulin sensitivity, and lipid profiles; and reduces stress, anxiety, and depression.
  • Physical activity can improve mental health by decreasing and preventing conditions such as anxiety and depression, as well as improving mood and other aspects of well-being.
  • Physical activity programming specifically designed to do so can improve psychosocial outcomes such as self-concept, social behaviors, goal orientation, and most notably self-efficacy. These attributes in turn are important determinants of current and future participation in physical activity.
  • Sedentary behaviors such as sitting and television viewing contribute to health risks both because of and independently of their impact on physical activity.
  • Health-related behaviors and disease risk factors track from childhood to adulthood, indicating that early and ongoing opportunities for physical activity are needed for maximum health benefit.
  • To be effective, physical activity programming must align with the predictable developmental changes in children’s exercise capacity and motor skills, which affect the activities in which they can successfully engage.
  • Frequent bouts of physical activity throughout the day yield short-term benefits for mental and cognitive health while also providing opportunities to practice skills and building confidence that promotes ongoing engagement in physical activity.
  • Distinct types of physical activity address unique health concerns and contribute in distinct ways to children’s health, suggesting that a varied regimen including aerobic and resistance exercise, structured and unstructured opportunities, and both longer sessions and shorter bouts will likely confer the greatest benefit.

References

Loading

If the article is helpful, please Click to Star Icon and Rate This Post!
[Total: 0 Average: 0]

Test Diagnosis of Ischial Bursitis

Test Diagnosis of Ischial Bursitis/Ischial bursitis also is known as ischiogluteal bursitis or weaver’s bottom is a condition where the bursa that lies between the ischial tuberosity and the gluteus maximus muscle becomes inflamed. This bursa is present physiologically in order to reduce the amount of frictional force generated between the gluteal muscle and the ischial tuberosity that otherwise might become damaged or irritated by this contact. This inflammation of the bursa is most commonly caused by prolonged pressure on the ischium, as occurs in sitting for extended periods of time or from the repeated movement of the Gluteus Maximus muscle in such activities as bicycling. These activities cause an inflammatory reaction that results in swelling and tenderness over the lower buttock and upper posterior thigh. Many other differential diagnoses have common presentations such as sciatica and tendonitis of hamstring muscles.

Ischial bursitis or ischiogluteal bursitis is the inflammation of the ischiogluteal bursa due to excessive or inappropriate physical exercise, prolonged sitting, running, repetitive jumping, and kicking. Since ischial bursitis is a rare, infrequently recognized pathology and is difficult to differentiate from the soft tissue disease and tumors (both malignant and benign), herein exemplified is a case with ischiogluteal bursitis whereby the role of magnetic resonance imaging (MRI) in the prompt diagnosis has been highlighted.

Pathophysiology of Ischial Bursitis

Bursa comes in a variety of forms: adventitious, subcutaneous, submuscular, and synovial. An ischial bursa is synovial, meaning it is composed of a fatty connective tissue capsule filled with synovial fluid. When infection or irritation occurs, cells of the synovia proliferate, resulting in increased production of synovial fluid. Inflammatory mediators such as cyclooxygenase, cytokines, and metalloproteases mediate this process. The result is a thick fluid-filled cavity with high amounts of fibrin, resulting in the formation of granulation tissue. Over time, this tissue will gradually interfere with the normal motion and activity of the surrounding tissues whether they are muscle, bone, or tendon.

Types of Ischial Bursitis

An ischial bursa is located between the hamstring muscle and the ischial tuberosity of the pelvis in the buttock area. This area bears the weight of the body when sitting. The hip joint is one of the largest joints in the body. It is composed of one osseous (contains bone) joint. The hip is built for weight-bearing and movement in several different planes. The stability of the hip joint comes from the capsule, ligaments, muscle and a cartilaginous tissue called the labrum. There are four bursae surrounding the hip joint. A bursa is a fluid-filled sack that reduces friction between tendons, and between tendons and bone. The most commonly injured bursa is the trochanteric bursa. The four major bursae of the hip are:

  • Trochanteric Bursa – located on the outside of the hip between the greater trochanter of the femur (leg bone) and the gluteal muscles
  • Ischial Bursa – located between the hamstring muscle and the ischial tuberosity of the pelvis in the buttock area. This area bears the weight of the body when sitting.
  • Iliopsoas Bursa – located in the groin area between the large psoas muscle and femur bone
  • Gluteal Medius Bursa – located between the gluteus medius muscle and the greater trochanter. It is near the trochanteric bursa.

Causes of Ischial Bursitis

  • Muscle Tightness – Tightness in the leg muscles and ischial bursitis itself increases the friction on ischial bursitis. Visit the knee stretches section for simple tests to see if your muscles are tight
  • Muscle Weakness – Weakness in the buttock muscles (glutes) puts more strain on ischial bursitis increasing your chances of developing ischial bursitis.
  • A direct blow to the ischial bursa from falling on the outside of the hip or on the buttocks can produce inflammation and irritation.
  • A fall onto the hip or ischial bursa.
  • Constant pressure on the ischial bursa from lying on that side.
  • Repeated stress or friction injury as the tendon rubs over the ischial bursa during activity. The weakness of the muscles over the ischial bursa.
  • Complications from rheumatoid arthritis, osteoarthritis or gout.
  • Infection of the ischial bursa.
  • The tightness of the structures of the hip like the psoas hip flexor, iliotibial band, and hamstrings.
  • The ischial bursa can become swollen as a response to other hip conditions.
  • Flat Feet – If you have flat feet (dropped foot arches) it slightly changes the angle of the leg, putting more friction through Ischial bursitis
  • Excessive long-distance or hill running – Overuse can also lead to ischial bursitis due to repetitive friction. Hill running puts even more tension through ischial bursitis.
  • Running on a sloped surface –  Lots of running surfaces e.g. roads and running tracks are slightly banked. The foot position on the lower leg causes ischial bursitis to be stretched
  • The sudden increase in activity – Someone who rapidly increases their training is at risk of developing due to the sudden increase in friction at the hip
  • Leg Length Discrepancy – If one leg is slightly shorter than the other it puts more strain on the hip.
  • Bowlegs – The curved nature of bow legs means there is a larger than normal space between the knees. This puts an extra stretch on the bursa

Symptoms of Ischial Bursitis

  • Pain, tenderness, swelling, warmth, or redness  may travel up or down the thigh or leg
  • Initially, pain at the beginning of an exercise that lessens once warmed up; eventually, pain throughout the activity, worsening as the activity continues; may cause the athlete to stop in the middle of training or competing
  • Pain that is worse when running down hills or stairs, on banked tracks, or next to the curb on the street
  • Pain that is felt most when the foot of the affected leg hits the ground
  • Possibly, crepitation (a crackling sound) when the tendon or bursa is moved or touched
  • Stabbing or stinging pain along the outside of the knee
  • A feeling of the snapping over the knee as it bends and straightens
  • Swelling near the outside of your knee
  • Occasionally, tightness and pain at the outside of the hip
  • Continuous pain following activity, particularly with walking, climbing, or descending stairs, or moving from a sitting to a standing position
  • Pain that is worse when running down hills or stairs.
  • Pain that is felt most when the foot of the affected leg hits the ground.
  • Possibly, a crackling sound when the bursa is moved or touched.

Diagnosis of Ischial Bursitis

A thorough subjective and objective examination from a physiotherapist may be sufficient to diagnose ischiogluteal bursitis. Further investigations such as an Ultrasound, X-ray, CT or MRI scan are often required to assist with diagnosis and assess the severity of the condition.

Treatments of Ischial Bursitis

Treatment of ischial bursitis is relatively symptom driven. Primary treatment is lifestyle modification by stopping the activity that caused bursitis in the first place, whether it was a physical activity or sitting for long periods of time on hard surfaces.

  • Rest – People with ischial bursitis may need to cut back on the intensity, duration and frequency of activity that leads to ischial bursitis pain (for example, reduce running or cycling mileage). People with moderate to severe ischial bursitis and pain may need to take time off from their sport and works. It can be frustrating and difficult for active people to cut back on their training schedules; however, rest is necessary for the injury to heal.
  • Ice – Apply ice to the affected area for 5-10 minutes at a time three to five times per day to help reduce inflammation. Make sure you wrap the ice in a thin towel to prevent an ice burn from occurring. You may need to ice the area every day for around 6-12 weeks.
  • Warm-up – Five to 10 minutes of gentle exercise and stretching can literally increase the body’s temperature, helping muscles become more elastic and responsive and reducing the chance of ischial bursitis or other injuries.
  • Change footwear – Switching out shoes and/or getting orthotic inserts can alter a person’s biomechanics and reduce the risk of ischial bursitis pain.
  • Massage – Much like the foam roller exercise, massage may help relieve tension and improve blood flow in-band thereby reducing pain.
  • Avoid Sitting on Hard Seats – Avoiding hard seats or stools is one of the best ways to reduce the pain from bursitis. If you do need to sit down for long periods, use a pillow or a doughnut cushion. Also sit upright and maintain a good posture while sitting.
  • Stretching – A doctor may recommend stretching or yoga to promote flexible muscles and other soft tissue.
  • Change running biomechanics – Runners may consider shortening their stride and running on soft, flat surfaces, such as tracks and even, grassy trails.
  • Change cycling biomechanics – Cyclists may consider adjusting saddle position and pedal clips. Even a small adjustment can alter the biomechanics of their pedaling and reduce ischial bursitis pain.
  • Ultrasound – Efforts to heal ischial bursitis and reduce pain may get a small boost from ultrasound and electrical muscle stimulation.
  • Iontophoresis – Doctors and physical therapists occasionally recommend iontophoresis, which uses a mild electrical current to administer an anti-inflammatory medicine (e.g. dexamethasone) through healthy skin and into the sore area. This treatment may be appropriate for people who can’t tolerate injections or want to avoid injections.
  • Frictional massage – It is recommended to use friction massage additional to the therapy on chronic bursitis because it affects the adhesions in chronic bursal problems. It breaks down scar tissue, increases extensibility and mobility of the structure, promotes normal orientation of collagen fibers, increases blood flow, reduces stress levels, and allows healing to take place. Friction massage is beneficial to the underlying structures. By using the Graston technique of friction massage the patient should be forewarned because it may initially aggravate a chronic subacute inflammation that is present. It is postulated that deep friction, especially with the Graston technique instruments, may initiate a new inflammatory cascade, which is necessary to reach the remodeling stage of the inflammatory process and result in healing of the area.

Medication

Longer-Term Treatment of Ischial Bursitis

  • Strengthening Exercises –  Strengthening the glutes, quads, and hamstrings improves how the hip and knee function which reduces the friction on bursitis. Visit the knee strengthening section for exercises that will help
  • Stretching Exercises – Stretching the quads, hamstrings, and ischial bursitis also helps reduce the friction at the knee. Visit the stretches section to see if tight muscles are likely contributing to your ischial bursitis
  • Gluteus stretch – Lie stretched out on your back with your head supported by a cushion. Bend one knee. With both hands around the knee, pull it slowly toward your chest and hold the position for 5 to 10 seconds. Slowly straighten your leg, and do the same with your other knee. Repeat 5 to 10 times.
  • Piriformis stretch –
  • Sit on the floor with both legs straight. Cross one leg over the other, with your foot along the knee. With the opposite hand, gently pull your bent knee across the middle of your body. Hold this position for 10 to 30 seconds. You should feel a stretch in the muscles of your outer thigh. Repeat with the other leg.
  • Taping – Taping can also be used to reduce the forces going through ischial bursitis – see you physical therapist/ sports injury specialist for more information
  • Massage – Deep tissue massage to the Iliotibial Band can reduce tightness, but it can be quite painful
  • Injections – If other treatments have failed, a cortisone injection can be given to help reduce pain and inflammation. However, it should always be accompanied by strengthening and stretching exercises to ensure the problem doesn’t return
  • Orthotics – Special insoles can be worn in your shoes to correct poor foot positions such as flat feet. See an orthopedist for a full assessment and advice

Physical Therapists

Common Physical Therapy interventions in the treatment of Hip Bursitis (Ischial Bursa) include:

  • Manual Therapeutic Technique (MTT) – hands-on care including soft tissue massage, stretching and joint mobilization by a physical therapist to regain mobility and range of motion of the knee. The use of mobilization techniques also helps to modulate pain.
  • Therapeutic Exercises (TE) – including stretching and strengthening exercises to regain range of motion and strengthen muscles of the knee to support, stabilize, and decrease the stresses placed on the ischial bursa and tendons of the hip joint.
  • Neuromuscular Reeducation (NMR) – to restore stability, retrain the lower extremity and improve movement techniques and mechanics (for example, running, kneeling, squatting and jumping) of the involved lower extremity to reduce stress on ischial bursa and tendons in daily activities.
  • Modalities including the use of ultrasound –  electrical stimulation, ice, cold laser, and others to decrease pain and inflammation of the ischial bursa.
  • A home program that includes strengthening, stretching and stabilization exercises and instructions to help the person perform daily tasks and advance to the next functional level.
  • In addition to the home program –  it is often necessary to initiate therapy in our office to directly treat the bursa.  Our office will usually use therapeutic ultrasound, electrical stimulation, transverse friction, cross friction or active release massage in addition to manual muscle and joint manipulation to treat this painful condition.  We will also employ correct stretching and strengthening exercises as well as Kinesio or KT Tape to help stabilize the region between treatment sessions.

References

Tes

Loading

If the article is helpful, please Click to Star Icon and Rate This Post!
[Total: 0 Average: 0]

Ischial Bursitis ; Causes, Symptoms, Diagnosis, Treatment

Ischial bursitis also is known as ischiogluteal bursitis or weaver’s bottom is a condition where the bursa that lies between the ischial tuberosity and the gluteus maximus muscle becomes inflamed. This bursa is present physiologically in order to reduce the amount of frictional force generated between the gluteal muscle and the ischial tuberosity that otherwise might become damaged or irritated by this contact. This inflammation of the bursa is most commonly caused by prolonged pressure on the ischium, as occurs in sitting for extended periods of time or from the repeated movement of the Gluteus Maximus muscle in such activities as bicycling. These activities cause an inflammatory reaction that results in swelling and tenderness over the lower buttock and upper posterior thigh. Many other differential diagnoses have common presentations such as sciatica and tendonitis of hamstring muscles.

Ischial bursitis or ischiogluteal bursitis is the inflammation of the ischiogluteal bursa due to excessive or inappropriate physical exercise, prolonged sitting, running, repetitive jumping, and kicking. Since ischial bursitis is a rare, infrequently recognized pathology and is difficult to differentiate from the soft tissue disease and tumors (both malignant and benign), herein exemplified is a case with ischiogluteal bursitis whereby the role of magnetic resonance imaging (MRI) in the prompt diagnosis has been highlighted.

Pathophysiology of Ischial Bursitis

Bursa comes in a variety of forms: adventitious, subcutaneous, submuscular, and synovial. An ischial bursa is synovial, meaning it is composed of a fatty connective tissue capsule filled with synovial fluid. When infection or irritation occurs, cells of the synovia proliferate, resulting in increased production of synovial fluid. Inflammatory mediators such as cyclooxygenase, cytokines, and metalloproteases mediate this process. The result is a thick fluid-filled cavity with high amounts of fibrin, resulting in the formation of granulation tissue. Over time, this tissue will gradually interfere with the normal motion and activity of the surrounding tissues whether they are muscle, bone, or tendon.

Types of Ischial Bursitis

An ischial bursa is located between the hamstring muscle and the ischial tuberosity of the pelvis in the buttock area. This area bears the weight of the body when sitting. The hip joint is one of the largest joints in the body. It is composed of one osseous (contains bone) joint. The hip is built for weight-bearing and movement in several different planes. The stability of the hip joint comes from the capsule, ligaments, muscle and a cartilaginous tissue called the labrum. There are four bursae surrounding the hip joint. A bursa is a fluid-filled sack that reduces friction between tendons, and between tendons and bone. The most commonly injured bursa is the trochanteric bursa. The four major bursae of the hip are:

  • Trochanteric Bursa – located on the outside of the hip between the greater trochanter of the femur (leg bone) and the gluteal muscles
  • Ischial Bursa – located between the hamstring muscle and the ischial tuberosity of the pelvis in the buttock area. This area bears the weight of the body when sitting.
  • Iliopsoas Bursa – located in the groin area between the large psoas muscle and femur bone
  • Gluteal Medius Bursa – located between the gluteus medius muscle and the greater trochanter. It is near the trochanteric bursa.

Causes of Ischial Bursitis

  • Muscle Tightness – Tightness in the leg muscles and ischial bursitis itself increases the friction on ischial bursitis. Visit the knee stretches section for simple tests to see if your muscles are tight
  • Muscle Weakness – Weakness in the buttock muscles (glutes) puts more strain on ischial bursitis increasing your chances of developing ischial bursitis.
  • A direct blow to the ischial bursa from falling on the outside of the hip or on the buttocks can produce inflammation and irritation.
  • A fall onto the hip or ischial bursa.
  • Constant pressure on the ischial bursa from lying on that side.
  • Repeated stress or friction injury as the tendon rubs over the ischial bursa during activity. The weakness of the muscles over the ischial bursa.
  • Complications from rheumatoid arthritis, osteoarthritis or gout.
  • Infection of the ischial bursa.
  • The tightness of the structures of the hip like the psoas hip flexor, iliotibial band, and hamstrings.
  • The ischial bursa can become swollen as a response to other hip conditions.
  • Flat Feet – If you have flat feet (dropped foot arches) it slightly changes the angle of the leg, putting more friction through Ischial bursitis
  • Excessive long-distance or hill running – Overuse can also lead to ischial bursitis due to repetitive friction. Hill running puts even more tension through ischial bursitis.
  • Running on a sloped surface –  Lots of running surfaces e.g. roads and running tracks are slightly banked. The foot position on the lower leg causes ischial bursitis to be stretched
  • The sudden increase in activity – Someone who rapidly increases their training is at risk of developing due to the sudden increase in friction at the hip
  • Leg Length Discrepancy – If one leg is slightly shorter than the other it puts more strain on the hip.
  • Bowlegs – The curved nature of bow legs means there is a larger than normal space between the knees. This puts an extra stretch on the bursa

Symptoms of Ischial Bursitis

  • Pain, tenderness, swelling, warmth, or redness  may travel up or down the thigh or leg
  • Initially, pain at the beginning of an exercise that lessens once warmed up; eventually, pain throughout the activity, worsening as the activity continues; may cause the athlete to stop in the middle of training or competing
  • Pain that is worse when running down hills or stairs, on banked tracks, or next to the curb on the street
  • Pain that is felt most when the foot of the affected leg hits the ground
  • Possibly, crepitation (a crackling sound) when the tendon or bursa is moved or touched
  • Stabbing or stinging pain along the outside of the knee
  • A feeling of the snapping over the knee as it bends and straightens
  • Swelling near the outside of your knee
  • Occasionally, tightness and pain at the outside of the hip
  • Continuous pain following activity, particularly with walking, climbing, or descending stairs, or moving from a sitting to a standing position
  • Pain that is worse when running down hills or stairs.
  • Pain that is felt most when the foot of the affected leg hits the ground.
  • Possibly, a crackling sound when the bursa is moved or touched.

Diagnosis of Ischial Bursitis

A thorough subjective and objective examination from a physiotherapist may be sufficient to diagnose ischiogluteal bursitis. Further investigations such as an Ultrasound, X-ray, CT or MRI scan are often required to assist with diagnosis and assess the severity of the condition.

Treatments of Ischial Bursitis

Treatment of ischial bursitis is relatively symptom driven. Primary treatment is lifestyle modification by stopping the activity that caused bursitis in the first place, whether it was a physical activity or sitting for long periods of time on hard surfaces.

  • Rest – People with ischial bursitis may need to cut back on the intensity, duration and frequency of activity that leads to ischial bursitis pain (for example, reduce running or cycling mileage). People with moderate to severe ischial bursitis and pain may need to take time off from their sport and works. It can be frustrating and difficult for active people to cut back on their training schedules; however, rest is necessary for the injury to heal.
  • Ice – Apply ice to the affected area for 5-10 minutes at a time three to five times per day to help reduce inflammation. Make sure you wrap the ice in a thin towel to prevent an ice burn from occurring. You may need to ice the area every day for around 6-12 weeks.
  • Warm-up – Five to 10 minutes of gentle exercise and stretching can literally increase the body’s temperature, helping muscles become more elastic and responsive and reducing the chance of ischial bursitis or other injuries.
  • Change footwear – Switching out shoes and/or getting orthotic inserts can alter a person’s biomechanics and reduce the risk of ischial bursitis pain.
  • Massage – Much like the foam roller exercise, massage may help relieve tension and improve blood flow in-band thereby reducing pain.
  • Avoid Sitting on Hard Seats – Avoiding hard seats or stools is one of the best ways to reduce the pain from bursitis. If you do need to sit down for long periods, use a pillow or a doughnut cushion. Also sit upright and maintain a good posture while sitting.
  • Stretching – A doctor may recommend stretching or yoga to promote flexible muscles and other soft tissue.
  • Change running biomechanics – Runners may consider shortening their stride and running on soft, flat surfaces, such as tracks and even, grassy trails.
  • Change cycling biomechanics – Cyclists may consider adjusting saddle position and pedal clips. Even a small adjustment can alter the biomechanics of their pedaling and reduce ischial bursitis pain.
  • Ultrasound – Efforts to heal ischial bursitis and reduce pain may get a small boost from ultrasound and electrical muscle stimulation.
  • Iontophoresis – Doctors and physical therapists occasionally recommend iontophoresis, which uses a mild electrical current to administer an anti-inflammatory medicine (e.g. dexamethasone) through healthy skin and into the sore area. This treatment may be appropriate for people who can’t tolerate injections or want to avoid injections.
  • Frictional massage – It is recommended to use friction massage additional to the therapy on chronic bursitis because it affects the adhesions in chronic bursal problems. It breaks down scar tissue, increases extensibility and mobility of the structure, promotes normal orientation of collagen fibers, increases blood flow, reduces stress levels, and allows healing to take place. Friction massage is beneficial to the underlying structures. By using the Graston technique of friction massage the patient should be forewarned because it may initially aggravate a chronic subacute inflammation that is present. It is postulated that deep friction, especially with the Graston technique instruments, may initiate a new inflammatory cascade, which is necessary to reach the remodeling stage of the inflammatory process and result in healing of the area.

Medication

Longer-Term Treatment of Ischial Bursitis

  • Strengthening Exercises –  Strengthening the glutes, quads, and hamstrings improves how the hip and knee function which reduces the friction on bursitis. Visit the knee strengthening section for exercises that will help
  • Stretching Exercises – Stretching the quads, hamstrings, and ischial bursitis also helps reduce the friction at the knee. Visit the stretches section to see if tight muscles are likely contributing to your ischial bursitis
  • Gluteus stretch – Lie stretched out on your back with your head supported by a cushion. Bend one knee. With both hands around the knee, pull it slowly toward your chest and hold the position for 5 to 10 seconds. Slowly straighten your leg, and do the same with your other knee. Repeat 5 to 10 times.
  • Piriformis stretch –
  • Sit on the floor with both legs straight. Cross one leg over the other, with your foot along the knee. With the opposite hand, gently pull your bent knee across the middle of your body. Hold this position for 10 to 30 seconds. You should feel a stretch in the muscles of your outer thigh. Repeat with the other leg.
  • Taping – Taping can also be used to reduce the forces going through ischial bursitis – see you physical therapist/ sports injury specialist for more information
  • Massage – Deep tissue massage to the Iliotibial Band can reduce tightness, but it can be quite painful
  • Injections – If other treatments have failed, a cortisone injection can be given to help reduce pain and inflammation. However, it should always be accompanied by strengthening and stretching exercises to ensure the problem doesn’t return
  • Orthotics – Special insoles can be worn in your shoes to correct poor foot positions such as flat feet. See an orthopedist for a full assessment and advice

Physical Therapists

Common Physical Therapy interventions in the treatment of Hip Bursitis (Ischial Bursa) include:

  • Manual Therapeutic Technique (MTT) – hands-on care including soft tissue massage, stretching and joint mobilization by a physical therapist to regain mobility and range of motion of the knee. The use of mobilization techniques also helps to modulate pain.
  • Therapeutic Exercises (TE) – including stretching and strengthening exercises to regain range of motion and strengthen muscles of the knee to support, stabilize, and decrease the stresses placed on the ischial bursa and tendons of the hip joint.
  • Neuromuscular Reeducation (NMR) – to restore stability, retrain the lower extremity and improve movement techniques and mechanics (for example, running, kneeling, squatting and jumping) of the involved lower extremity to reduce stress on ischial bursa and tendons in daily activities.
  • Modalities including the use of ultrasound –  electrical stimulation, ice, cold laser, and others to decrease pain and inflammation of the ischial bursa.
  • A home program that includes strengthening, stretching and stabilization exercises and instructions to help the person perform daily tasks and advance to the next functional level.
  • In addition to the home program –  it is often necessary to initiate therapy in our office to directly treat the bursa.  Our office will usually use therapeutic ultrasound, electrical stimulation, transverse friction, cross friction or active release massage in addition to manual muscle and joint manipulation to treat this painful condition.  We will also employ correct stretching and strengthening exercises as well as Kinesio or KT Tape to help stabilize the region between treatment sessions.

References

Loading

If the article is helpful, please Click to Star Icon and Rate This Post!
[Total: 0 Average: 0]

Stroke Rehabilitation, Types, Recovery, Go To Works

Stroke Rehabilitation helps stroke survivors relearn skills that are lost when part of the brain is damaged. For example, these skills can include coordinating leg movements in order to walk or carrying out the steps involved in any complex activity. Rehabilitation also teaches survivors new ways of performing tasks to circumvent or compensate for any residual disabilities. Individuals may need to learn how to bathe and dress using only one hand, or how to communicate effectively when their ability to use language has been compromised. There is a strong consensus among rehabilitation experts that the most important element in any rehabilitation program is carefully directed,well-focused, repetitive practice—the same kind of practice used by all people when they learn a new skill, such as playing the piano or pitching a baseball.

What disabilities can result from a stroke/Stroke Rehabilitation

The types and degrees of disability that follow a stroke depend upon which area of the brain is damaged. Generally, stroke can cause five types of disabilities: paralysis or problems controlling movement; sensory disturbances including pain; problems using or understanding language; problems with thinking and memory; and emotional disturbances.

Paralysis or problems controlling movement (motor control)

  • Paralysis is one of the most common disabilities resulting from stroke. The paralysis is usually on the side of the body opposite the side of the brain damaged by stroke and may affect the face, an arm, a leg, or the entire side of the body. This one-sided paralysis is called hemiplegia (one-sided weakness is called hemiparesis).
  • Stroke patients with hemiparesis or hemiplegia may have difficulty with everyday activities such as walking or grasping objects. Some stroke patients have problems with swallowing, called dysphagia, due to damage to the part of the brain that controls the muscles for swallowing.
  • Damage to a lower part of the brain, the cerebellum, can affect the body’s ability to coordinate movement, a disability called ataxia, leading to problems with body posture, walking, and balance.

Sensory disturbances including pain

  • Stroke patients may lose the ability to feel touch, pain, temperature, or position. Sensory deficits also may hinder the ability to recognize objects that patients are holding and can even be severe enough to cause loss of recognition of one’s own limb. Some stroke patients experience pain, numbness or odd sensations of tingling or prickling in paralyzed or weakened limbs, a symptom known as paresthesias.
  • The loss of urinary continence is fairly common immediately after a stroke and often results from a combination of sensory and motor deficits. Stroke survivors may lose the ability to sense the need to urinate or the ability to control bladder muscles. Some may lack enough mobility to reach a toilet in time. Loss of bowel control or constipation also may occur. Permanent incontinence after a stroke is uncommon, but even a temporary loss of bowel or bladder control can be emotionally difficult for stroke survivors.
  • Stroke survivors frequently have a variety of chronic pain syndromes resulting from stroke-induced damage to the nervous system (neuropathic pain). In some stroke patients, pathways for sensation in the brain are damaged, causing the transmission of false signals that result in the sensation of pain in a limb or side of the body that has the sensory deficit.
  • The most common of these pain syndromes is called “thalamic pain syndrome” (caused by a stroke to the thalamus, which processes sensory information from the body to the brain), which can be difficult to treat even with medications. Finally, some pain that occurs after stroke is not due to nervous system damage, but rather to mechanical problems caused by the weakness from the stroke.
  • Patients who have a seriously weakened or paralyzed arm commonly experience moderate to severe pain that radiates outward from the shoulder. Most often, the pain results from lack of movement in a joint that has been immobilized for a prolonged period of time (such as having your arm or shoulder in a cast for weeks) and the tendons and ligaments around the joint become fixed in one position.
  • This is commonly called a “frozen” joint; “passive” movement (the joint is gently moved or flexed by a therapist or caregiver rather than by the individual) at the joint in a paralyzed limb is essential to prevent painful “freezing” and to allow easy movement if and when voluntary motor strength returns.

Problems using or understanding language (aphasia)

  • At least one-fourth of all stroke survivors experience language impairments, involving the ability to speak, write, and understand spoken and written language. A stroke-induced injury to any of the brain’s language-control centers can severely impair verbal communication.
  • The dominant centers for language are in the left side of the brain for right-handed individuals and many left-handers as well. Damage to a language center located on the dominant side of the brain, known as Broca’s area, causes expressive aphasia. People with this type of aphasia have difficulty conveying their thoughts through words or writing.
  • They lose the ability to speak the words they are thinking and to put words together in coherent, grammatically correct sentences. In contrast, damage to a language center located in a rear portion of the brain, called Wernicke’s area, results in receptive aphasia.
  • People with this condition have difficulty understanding spoken or written the language and often have incoherent speech. Although they can form grammatically correct sentences, their utterances are often devoid of meaning. The most severe form of aphasia, global aphasia, is caused by extensive damage to several areas of the brain involved in language function. People with global aphasia lose nearly all their linguistic abilities; they cannot understand language or use it to convey a thought.

Problems with thinking and memory

  • Stroke can cause damage to parts of the brain responsible for memory, learning, and awareness. Stroke survivors may have dramatically shortened attention spans or may experience deficits in short-term memory.
  • Individuals also may lose their ability to make plans, comprehend meaning, learn new tasks, or engage in other complex mental activities.
  • Two fairly common deficits resulting from stroke are anosognosia, an inability to acknowledge the reality of the physical impairments resulting from stroke, and neglect, the loss of the ability to respond to objects or sensory stimuli located on the stroke-impaired side.
  • Stroke survivors who develop apraxia (loss of ability to carry out a learned purposeful movement) cannot plan the steps involved in a complex task and act on them in the proper sequence. Stroke survivors with apraxia also may have problems following a set of instructions. Apraxia appears to be caused by a disruption of the subtle connections that exist between thought and action.

Emotional disturbances

  • Many people who survive a stroke feel fear, anxiety, frustration, anger, sadness, and a sense of grief for their physical and mental losses. These feelings are a natural response to the psychological trauma of stroke. Some emotional disturbances and personality changes are caused by the physical effects of brain damage.
  • Clinical depression, which is a sense of hopelessness that disrupts an individual’s ability to function, appears to be the emotional disorder most commonly experienced by stroke survivors.
  • Signs of clinical depression include sleep disturbances, a radical change in eating patterns that may lead to sudden weight loss or gain, lethargy, social withdrawal, irritability, fatigue, self-loathing, and suicidal thoughts. Post-stroke depression can be treated with antidepressant medications and psychological counseling.

What medical professionals specialize in post-stroke rehabilitation?

  • Post-stroke rehabilitation involves physicians; rehabilitation nurses; physical, occupational, recreational, speech-language, and vocational therapists; and mental health professionals.

Physicians

  • Physicians have the primary responsibility for managing and coordinating the long-term care of stroke survivors, including recommending which rehabilitation programs will best address individual needs. Physicians also are responsible for caring for the stroke survivor’s general health and providing guidance aimed at preventing a second stroke, such as controlling high blood pressure or diabetes and eliminating risk factors such as cigarette smoking, excessive weight, a high-cholesterol diet, and high alcohol consumption.
  • Neurologists usually lead acute-care stroke teams and direct patient care during hospitalization. They sometimes participate on the long-term rehabilitation team. Other subspecialists often lead the rehabilitation stage of care, especially physiatrists, who specialize in physical medicine and rehabilitation.

Rehabilitation nurses

  • Nurses specializing in rehabilitation help survivors relearn how to carry out the basic activities of daily living. They also educate survivors about routine health care, such as how to follow a medication schedule, how to care for the skin, how to move out of a bed and into a wheelchair, and special needs for people with diabetes. Rehabilitation nurses also work with survivors to reduce risk factors that may lead to a second stroke, and provide training for caregivers.
  • Nurses are closely involved in helping stroke survivors manage personal care issues, such as bathing and controlling incontinence. Most stroke survivors regain their ability to maintain continence, often with the help of strategies learned during rehabilitation. These strategies include strengthening pelvic muscles through special exercises and following a timed voiding schedule. If problems with incontinence continue, nurses can help caregivers learn to insert and manage catheters and to take special hygienic measures to prevent other incontinence-related health problems from developing.

Physical therapists

  • Physical therapists specialize in treating disabilities related to motor and sensory impairments. They are trained in all aspects of anatomy and physiology related to normal function, with an emphasis on movement. They assess the stroke survivor’s strength, endurance, range of motion, gait abnormalities, and sensory deficits to design individualized rehabilitation programs aimed at regaining control over motor functions.
  • Physical therapists help survivors regain the use of stroke-impaired limbs, teach compensatory strategies to reduce the effect of remaining deficits, and establish ongoing exercise programs to help people retain their newly learned skills. Disabled people tend to avoid using impaired limbs, a behavior called learned non-use. However, the repetitive use of impaired limbs encourages brain plasticity and helps reduce disabilities.
  • Strategies used by physical therapists to encourage the use of impaired limbs include selective sensory stimulation such as tapping or stroking, active and passive range-of-motion exercises, and temporary restraint of healthy limbs while practicing motor tasks.
  • In general, physical therapy emphasizes practicing isolated movements, repeatedly changing from one kind of movement to another, and rehearsing complex movements that require a great deal of coordination and balance, such as walking up or downstairs or moving safely between obstacles. People too weak to bear their own weight can still practice repetitive movements during hydrotherapy (in which water provides sensory stimulation as well as weight support) or while being partially supported by a harness. A recent trend in physical therapy emphasizes the effectiveness of engaging in goal-directed activities, such as playing games, to promote coordination. Physical therapists frequently employ selective sensory stimulation to encourage use of impaired limbs and to help survivors with neglect regain awareness of stimuli on the neglected side of the body.

Occupational and recreational therapists

  • Like physical therapists, occupational therapists are concerned with improving motor and sensory abilities and ensuring patient safety in the post-stroke period. They help survivors relearn skills needed for performing self-directed activities (also called occupations) such as personal grooming, preparing meals, and housecleaning. Therapists can teach some survivors how to adapt to driving and provide on-road training. They often teach people to divide a complex activity into its component parts, practice each part, and then perform the whole sequence of actions. This strategy can improve coordination and may help people with apraxia relearn how to carry out planned actions.
  • Occupational therapists also teach people how to develop compensatory strategies and change elements of their environment that limit activities of daily living. For example, people with the use of only one hand can substitute hook and loop fasteners (such as Velcro) for buttons on clothing. Occupational therapists also help people make changes in their homes to increase safety, remove barriers, and facilitate physical functioning, such as installing grab bars in bathrooms.
  • Recreational therapists help people with a variety of disabilities to develop and use their leisure time to enhance their health, independence, and quality of life.

Speech-language pathologists

  • Speech-language pathologists help stroke survivors with aphasia relearn how to use language or develop alternative means of communication. They also help people improve their ability to swallow, and they work with patients to develop problem-solving and social skills needed to cope with the after-effects of a stroke.
  • Many specialized therapeutic techniques have been developed to assist people with aphasia. Some forms of short-term therapy can improve comprehension rapidly. Intensive exercises such as repeating the therapist’s words, practicing following directions, and doing reading or writing exercises form the cornerstone of language rehabilitation. Conversational coaching and rehearsal, as well as the development of prompts or cues to help people remember specific words, are sometimes beneficial. Speech-language pathologists also help stroke survivors develop strategies for circumventing language disabilities. These strategies can include the use of symbol boards or sign language. Recent advances in computer technology have spurred the development of new types of equipment to enhance communication.
  • Speech-language pathologists use special types of imaging techniques to study swallowing patterns of stroke survivors and identify the exact source of their impairment. Difficulties with swallowing have many possible causes, including a delayed swallowing reflex, an inability to manipulate food with the tongue, or an inability to detect food remaining lodged in the cheeks after swallowing. When the cause has been pinpointed, speech-language pathologists work with the individual to devise strategies to overcome or minimize the deficit. Sometimes, simply changing body position and improving posture during eating can bring about improvement. The texture of foods can be modified to make swallowing easier; for example, thin liquids, which often cause choking, can be thickened. Changing eating habits by taking small bites and chewing slowly can also help alleviate dysphagia.

Vocational therapists

  • Approximately one-fourth of all strokes occur in people between the ages of 45 and 65. For most people in this age group, returning to work is a major concern. Vocational therapists perform many of the same functions that ordinary career counselors do. They can help people with residual disabilities identify vocational strengths and develop résumés that highlight those strengths. They also can help identify potential employers, assist in specific job searches, and provide referrals to stroke vocational rehabilitation agencies.

References

  1. https://www.ninds.nih.gov/Disorders/Patient-Caregiver-Education/Fact-Sheets/Post-Stroke-Rehabilitation-Fact-Sheet

Loading

If the article is helpful, please Click to Star Icon and Rate This Post!
[Total: 0 Average: 0]
Translate »